Everybody hates changing an established workflow and I’m no exception – I avoid doing so unless I see significant value. The recent change to the default setting in Site Explorer is one example of such value and I’m going to give you three ways you can improve your workflow right now.
1. The first is unspectacular but nonetheless useful. You get a clear, uncluttered view that you scan quickly and get a good idea of who is linking.
2. You can quickly see bloggers and journalists who have repeatedly written about a specific competitor. And that’s very useful in finding writers you can approach
3. Even better, using Clique Hunter, you can quickly see bloggers and journalist who have repeatedly written about multiple competitors. And that’s very, very useful in giving you a wide range of quality writers who concentrate on your industry.
I’ll look at each of these in turn and then give you a short video (3 mins 45 secs) on the changes at the end of this post.
So what is the big change?
Previously, Site Explorer showed you the top backlinks to any URL, irrespective of which referring domain they came from.
Now the default is to show you just the top link from each referring domain.
Of course you can change the default back to the way it was but I’ll give you 3 reasons why you shouldn’t.
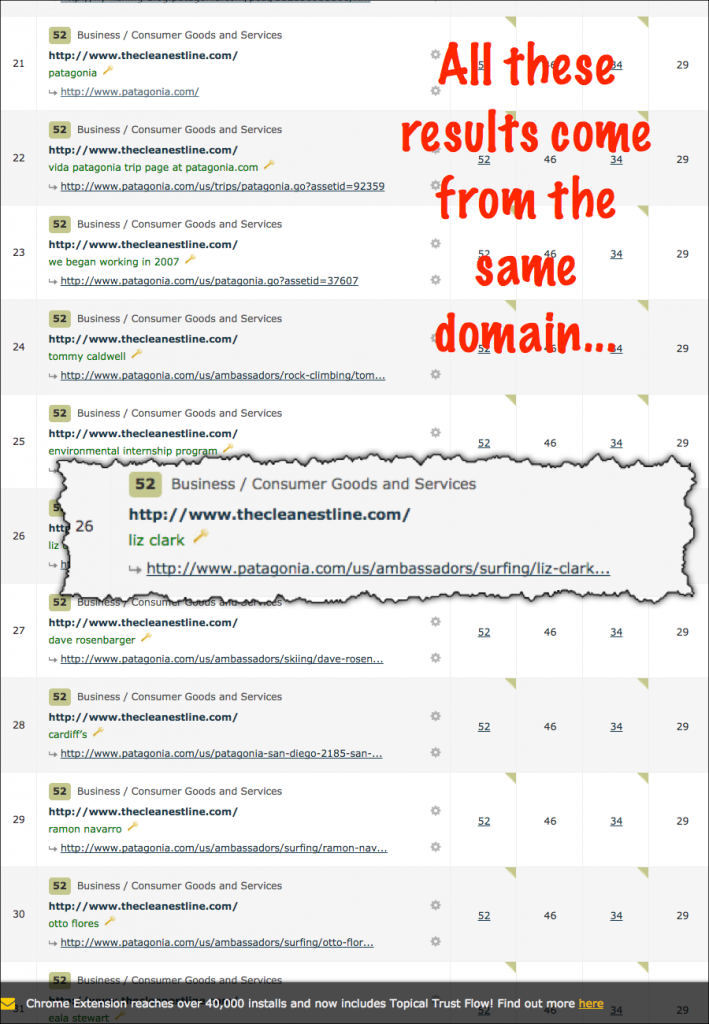
1. In the old way of doing things, the results pages could be dominated by lots of links from the same domain. This was a nuisance if you wanted to get as many referring domains as possible. Here’s an example of multiple links from thecleanestline.com to Patagonia.com:
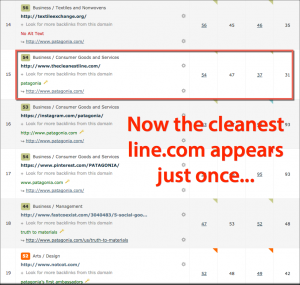
With the new default, thecleanestline.com appears only once in the default results. Now, I just scan the results and in a matter of seconds get a good idea of multiple domains link to Patagonia.com:
2. The change in the default allows you to easily find bloggers and journalists who have written repeatedly about a competitor.
Let’s look at Patagonia.com again as an example.
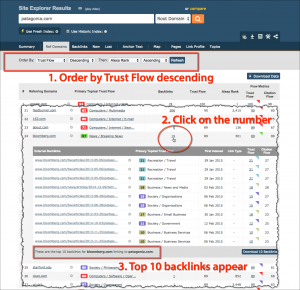
Switch to the ‘Referring domains’ view:
There are 3 steps:
1. Order by Trust Flow descending so you get the most trusted sites at the top of results.
2. Click on the number in the backlinks column for your chosen referring domain – I’ve chosen Bloomberg.com as an example.
3. Browse the top 10 links that appear and you can click on any of the top 10 links to see them in situation.
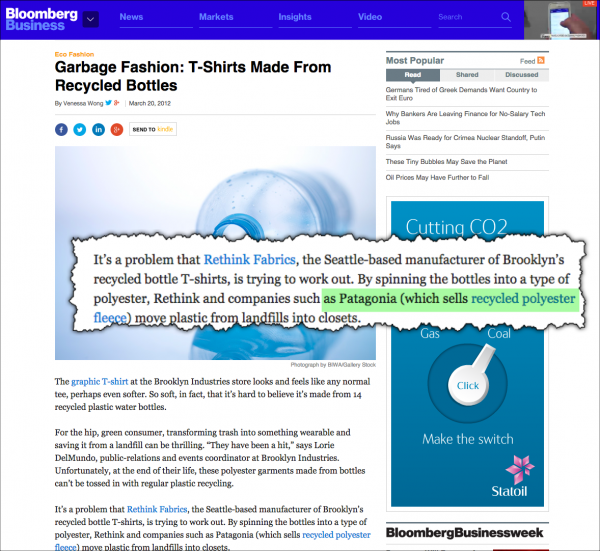
I’ll click on http://www.bloomberg.com/bw/articles/2012-03-20/garbage-fashion-t-shirts-made-from-recycled-bottles and here’s a screenshot:
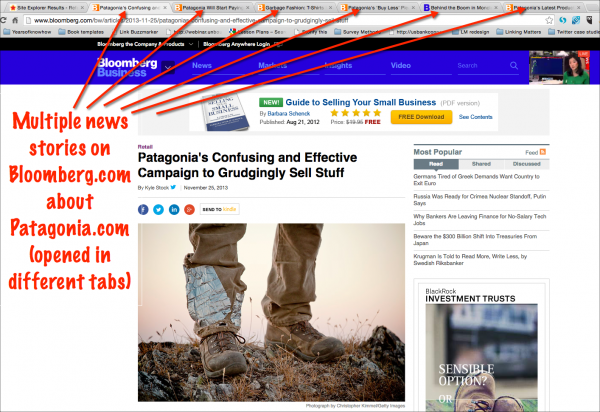
I can open each of the top 10 links in a new tab and then I can see multiple stories that feature Patagonia on Bloomberg.com:
And I can see who the blogger or journalist behind each story was.
So I can see that 3 of those stories have been written by Kyle Stock, 2 have been written by Caroline Winter and another by Vanessa Wong.
If I was a serious competitor of Patagonia.com, I’d certainly want to approach those 3 journalists with my own PR pitches.
3. The change also allows you to extend your search for bloggers and journalists dramatically in Clique Hunter.
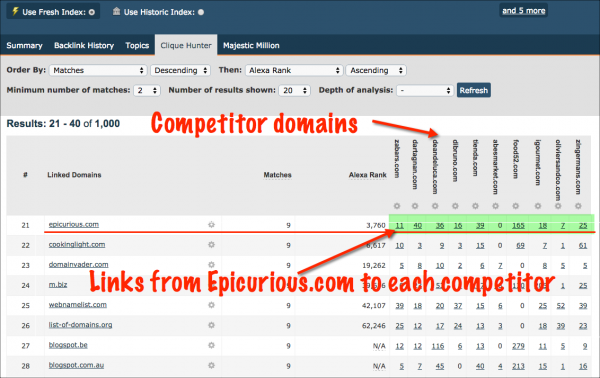
I’ve used gourmet food companies in Clique Hunter to show how this happens. Clique Hunter allows me to see sites that link to two or more of these gourmet food sites.
All of the competitors I entered are listed along the top and underneath each domain is an underlined number.
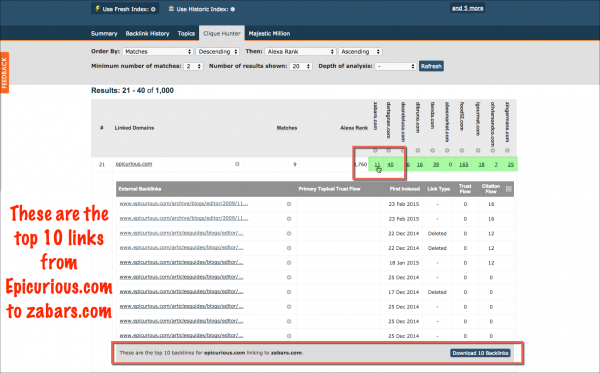
Click on the number and the top 10 links to each competitor can be opened up as in this screenshot:
This shows the top 10 links from Epicurious.com that point to Zabars.com.
I can move along the highlighted row, looking at 10 links from Epicurious.com to each competitor in turn.
This gives me up to 10 x 10 = 100 examples of where Epicurious.com has linked to my competitors.
That’s going to show me exactly what types of stories I should be pitching to Epicurious.com – and even better, who I should be pitching them to. And that’s just for one referring domain. I have lots more opportunities from a variety of referring domains just sitting in front of me.
So that’s the 3 quick workflow improvements. I hope you find them useful and if you’ve got your own suggestions, please add them in the comments below.
And finally, here’s the video I promised – it’s only 3 mins and 45 seconds and will let you see the new feature in action.
If you find these tips useful, sign up for our FREE 12-part link building video course, currently in English ‘Get up to speed with Majestic’.


