


A short while back, a John Doherty asked this…

Sometimes Majestic has so many ways of dicing data that it is not always clear that you are getting ALL the data we have on a link profile. John demonstrated a case in point, so we decided to write up a post on how to find ALL the links for any given anchor text in Majestic’s data.
There is currently debate on whether Anchor text links are “good” or “Bad” for SEO.
Focusing on Anchor Text when analysing your Link Profile is useful in many ways. Identifying strange or negative Anchor Text can potentially help you pin point any spam or possible toxic backlinks. Finding out what main keywords are being used when linked to your site can help with your overall keyword strategy. When analysing the competition, you can find key opportunities and potential sites to gain links, place adverts on or for outreach.
In this post we will look at how you can use Majestic to easily see your commonly used Anchor Text as well as how to make sure you grab all the links for analysis.
The Quickest Way
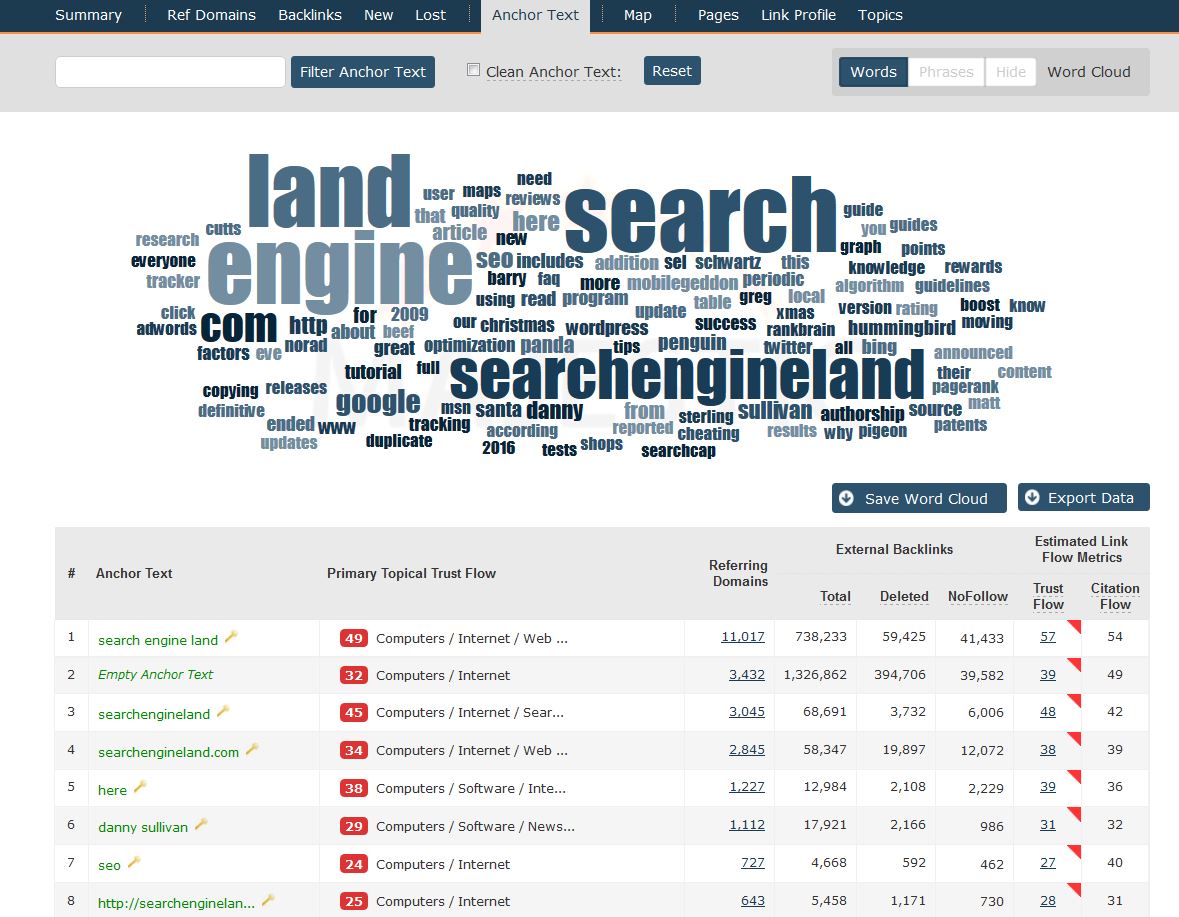
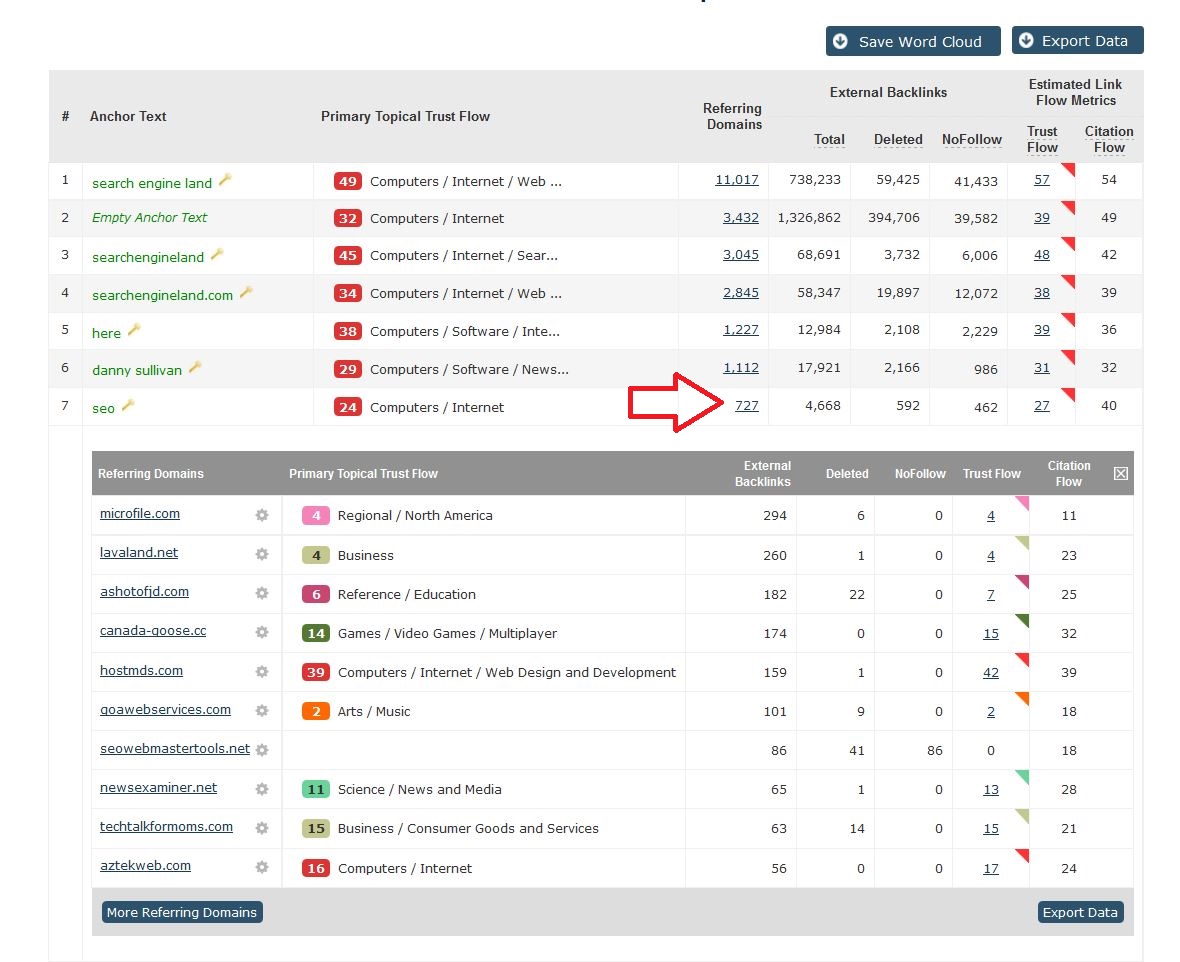
Once you have chosen the Anchor Text you want to focus on, the next step is then gathering the data. Using the Site Explorer from Majestic not only helps you find popular Anchor Text with a very easy to use word cloud, but also the data is already split into bitesize chunks for easy analysis. Simply clicking of the numbers within the columns will give you more in depth data. You also have the option to export everything offline into an Excel, CSV or TSV file for sorting.
However, sometimes you have a big site and not ALL the link counts match with the data you are given. So, how do you get ALL the links associated with a particular Anchor Text? The answer is, Advanced Reports. All premium users have the ability to not only create reports on their own sites, but also on direct and indirect competitors.
The Best Way
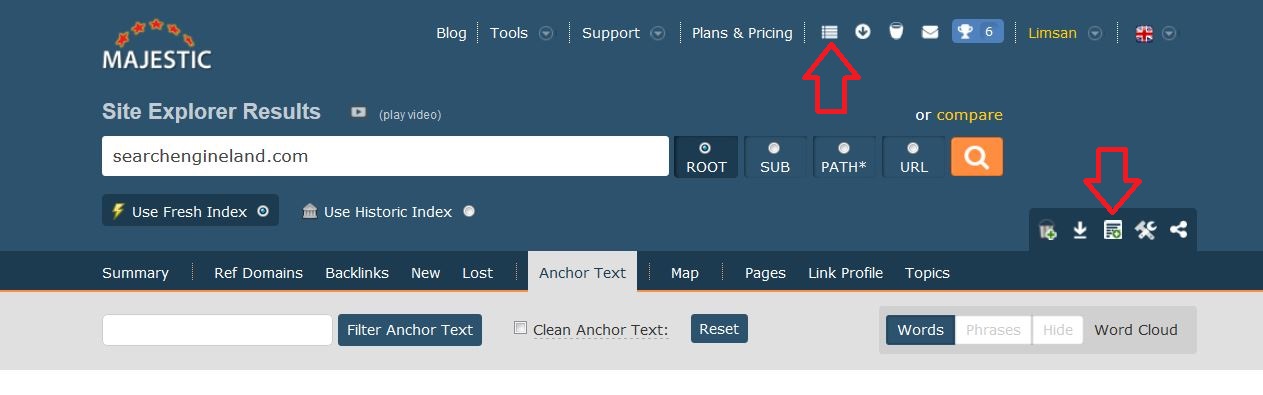
First step is to create the report and to do this you have 2 options. One, through Site Explorer itself by clicking on the Create Report button (who would have guessed!) and two, via the My Reports section of your account and using Report Options. As always, you have the option to create the report using either Fresh or Historic Index and which type (Root, Sub, URL) Click Create and once it has finished analysing, go ahead and open the report. For a complete analysis, I always recommend creating reports at Root level.
Once open you are presented with the Overview. Key facts and tables showing you the important things we think you need to know. There is a table here dedicated to Top Anchors. As expected, you can click on the Anchor Text to bring up the data relating to it.
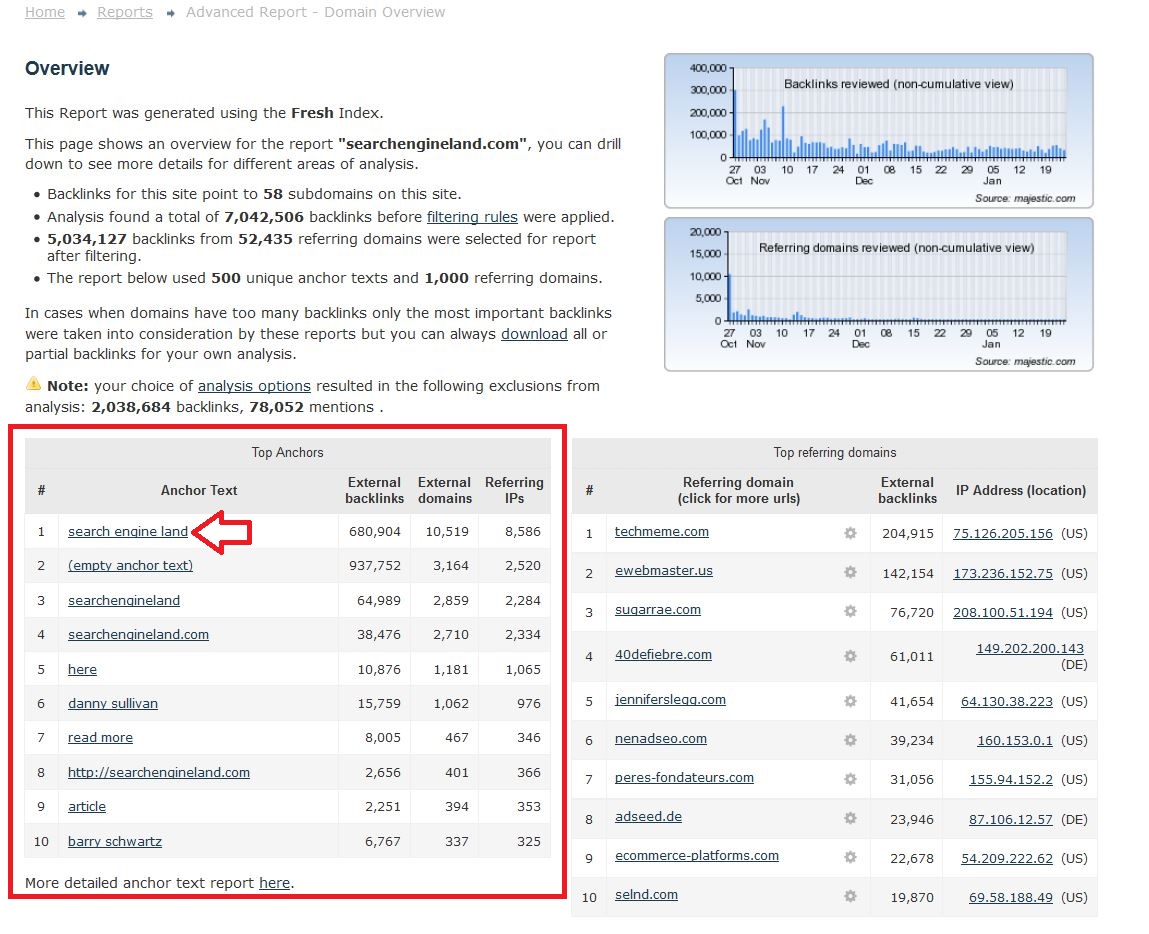
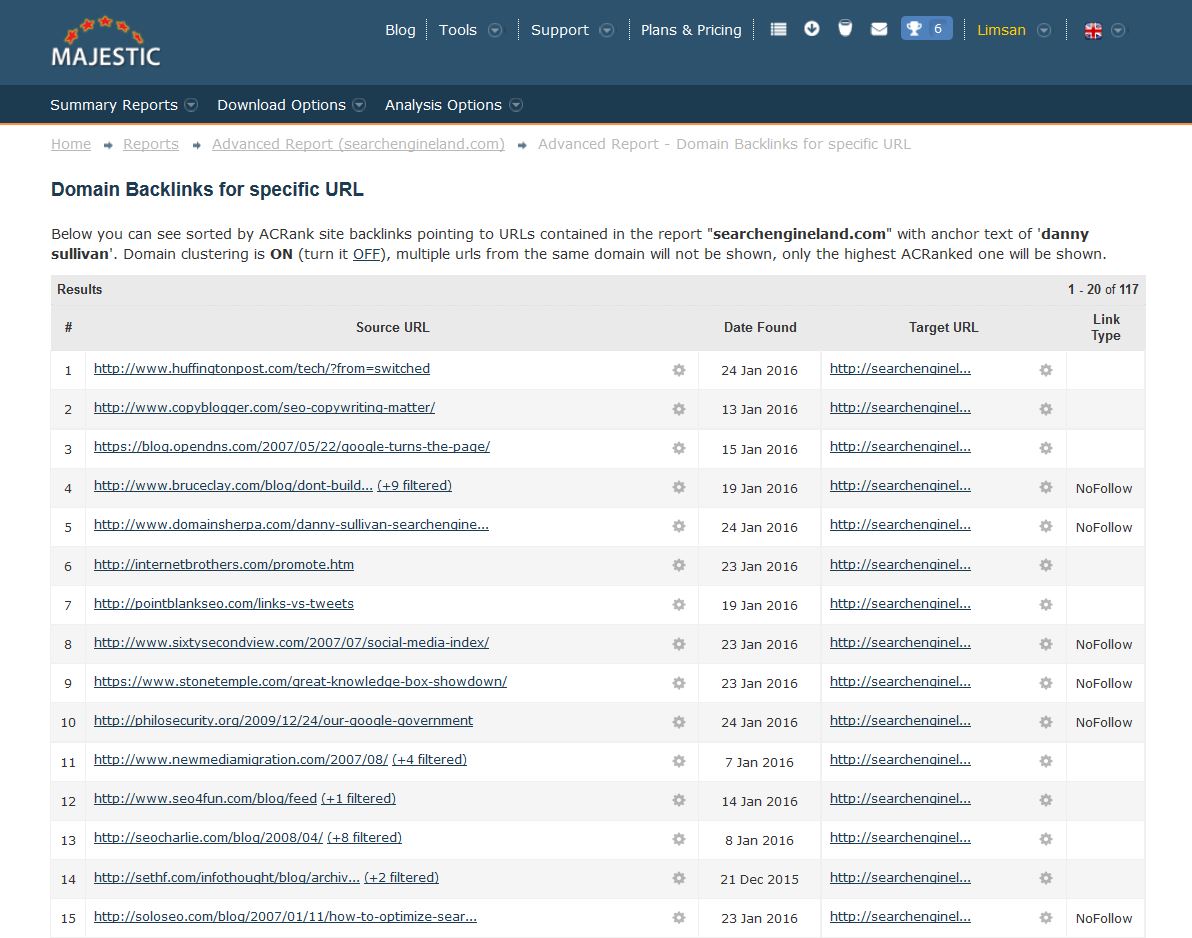
Please note that these are batched by Sub Domain so sometimes to get more data you will need to drill down a little further. You may notice that here, the match counts are still slightly varied compared to total link counts. This is because, in particular with large sites, sometimes there is TOO much data to be presented to you this way. Therefore, we tend to show you the most important and strongest links within the report. I still need all my links I hear you say. Well fear not, we do provide you with this data.
At the top of the report you should find the drop down menu named Analysis Options. There are lots of cool things you can do with the Analysis Options. Take a look at these Power User Tips to find out more. For this post, we are focusing on our Anchor Text tab. Here you have 2 options, ‘Exact Match’ and ‘Contains Text’.
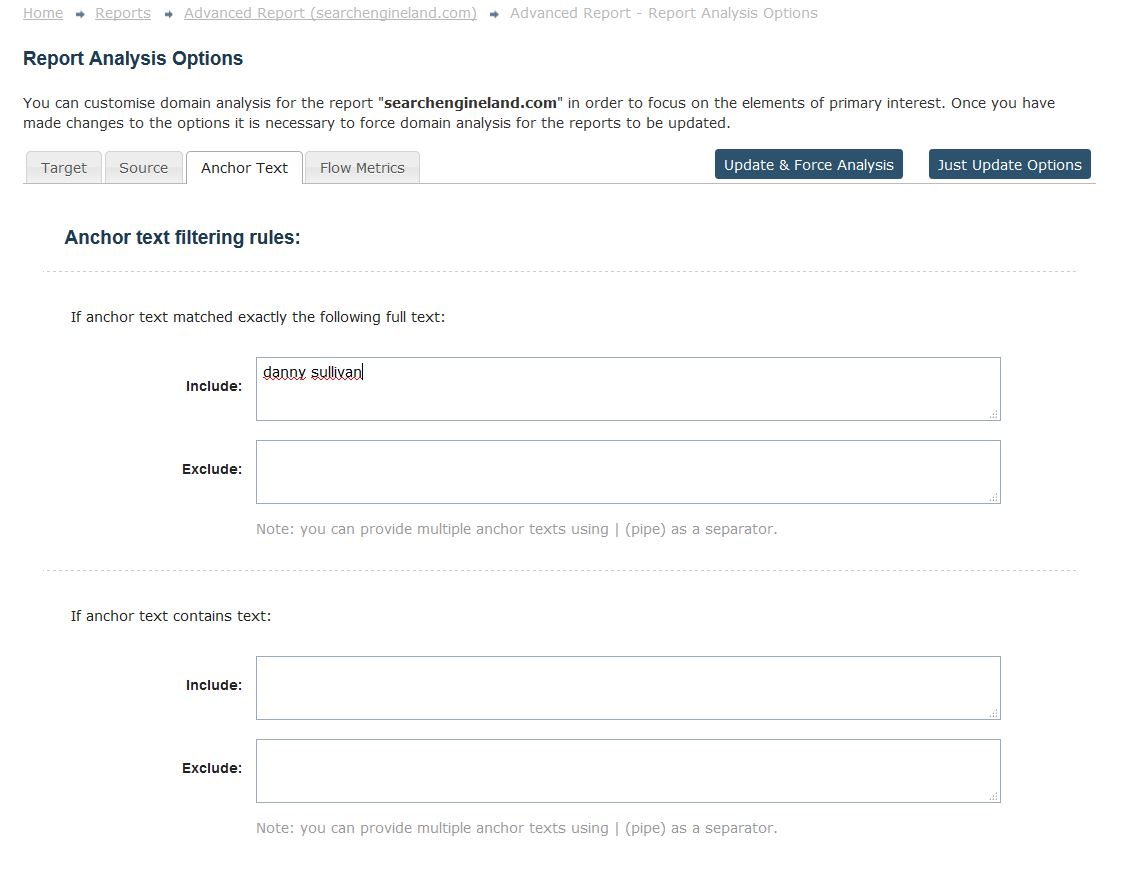
Which box you pick will depend on what you wish to know. If it is very specific data that you need, I would say Exact Match will be the one to go for. If you are looking at the data in regards to outreach, the latter might get you more results you can check. Once you have inputted all the data you need, click Update & Force Analysis which is at the top right of the page.
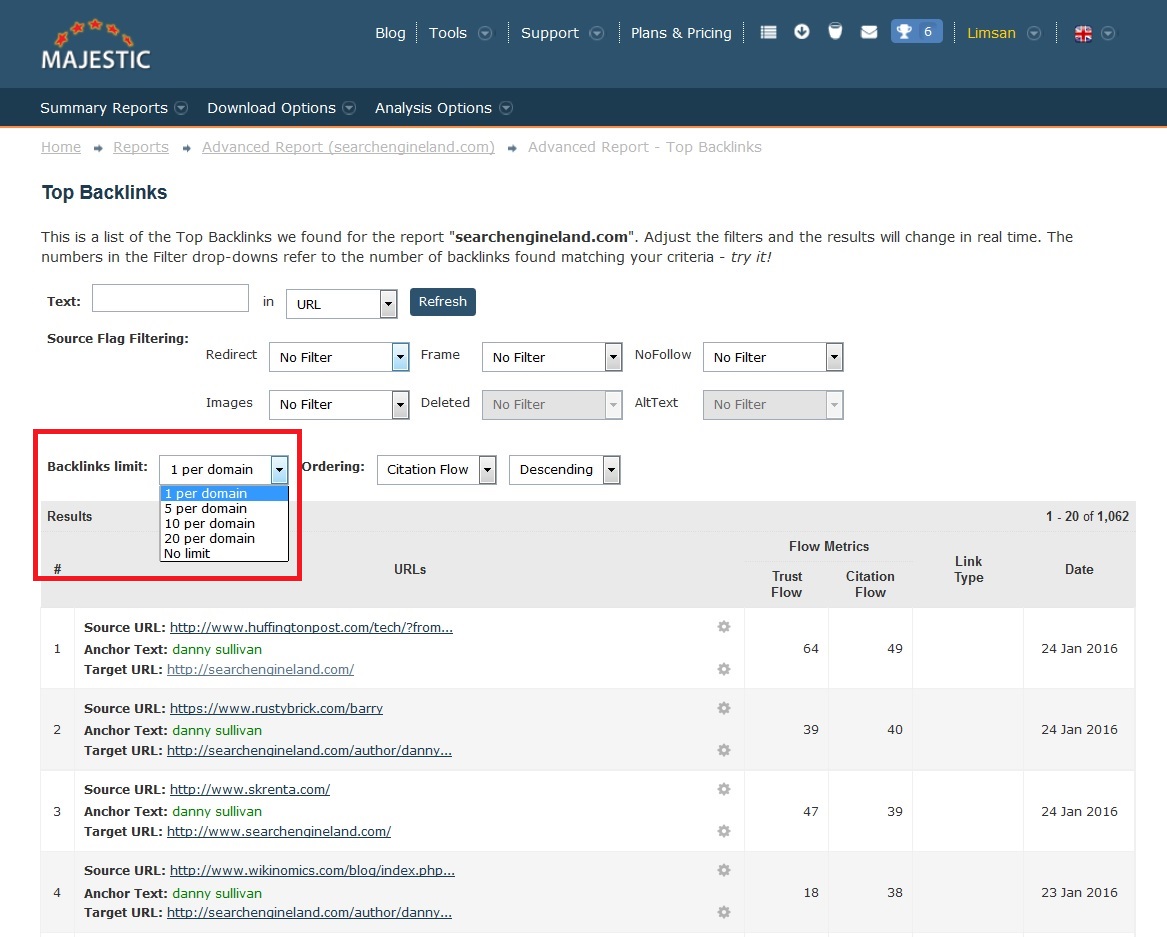
When your report has completed the analysis, the report will not be showing you the links associated with the Anchor Text you have chosen. You now have two options with this filtered data set. Either stay online and look at the Top Backlinks section and see the links. This is useful if you have further filtering you wish to do or only wish to see 1 backlink per domain instead of all.
Another option is downloading the data. To do this, I recommend using Download Options and the Filter Backlinks to Download. When your file is completed you can find it within your downloads at majestic.com/reports/downloads
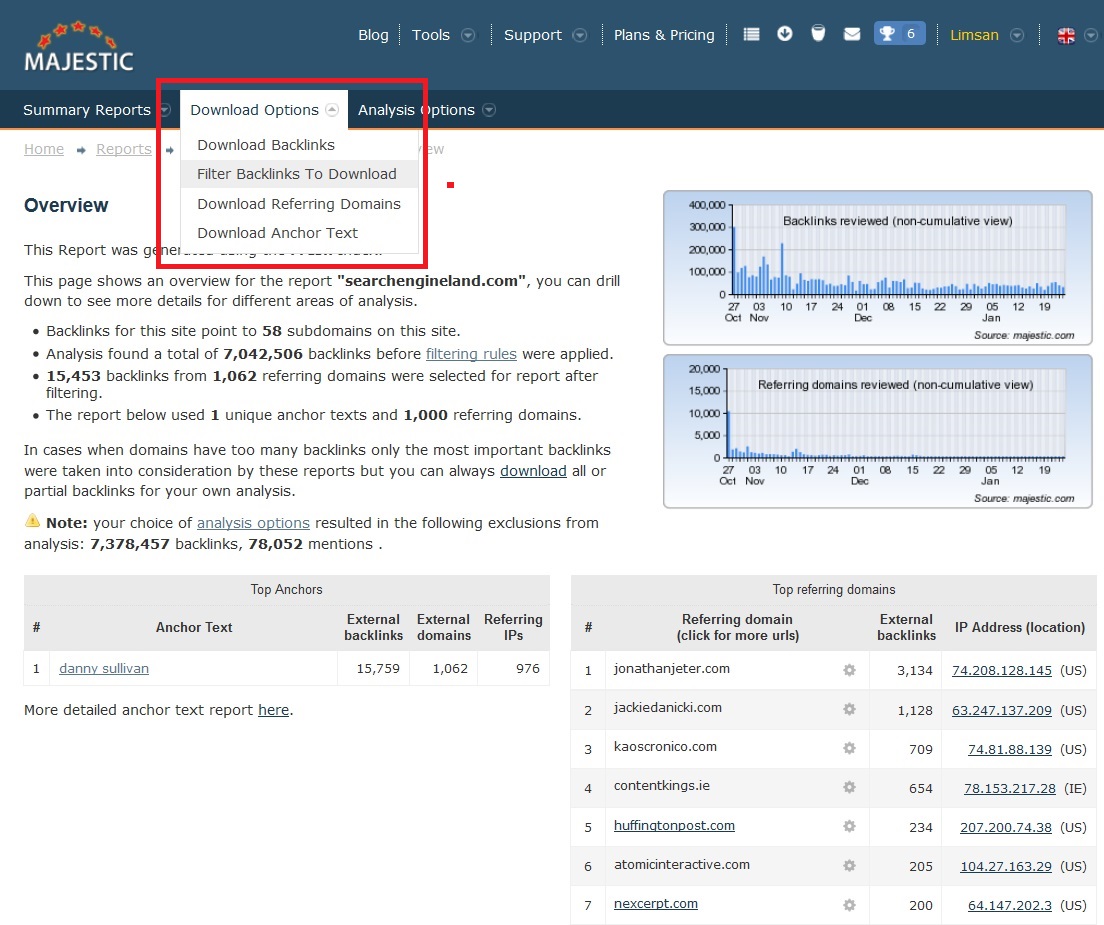
For a complete analysis of the website or page, you can repeat these steps for both Fresh and Historic Indexes and then de-duplicate the exported files. We previously wrote about Excel Template which should speed this process up.
It is also worth noting that Advanced Reports have some automatic filters which mean that No Follow, Deleted, Alt Text and Mentions are excluded. This post here will explain how to change these or you can update your Settings.
- New Bulk Backlink Checker Features - May 13, 2016
- Finding New Link Opportunities Just Got Easier! - March 16, 2016
- Were Your Lost Links Really Deleted? - March 15, 2016
Thanks for the article. Great to remind us about what is possible with Majestic. Tutorials are always very much welcome.
March 27, 2016 at 5:06 am— Rainer